
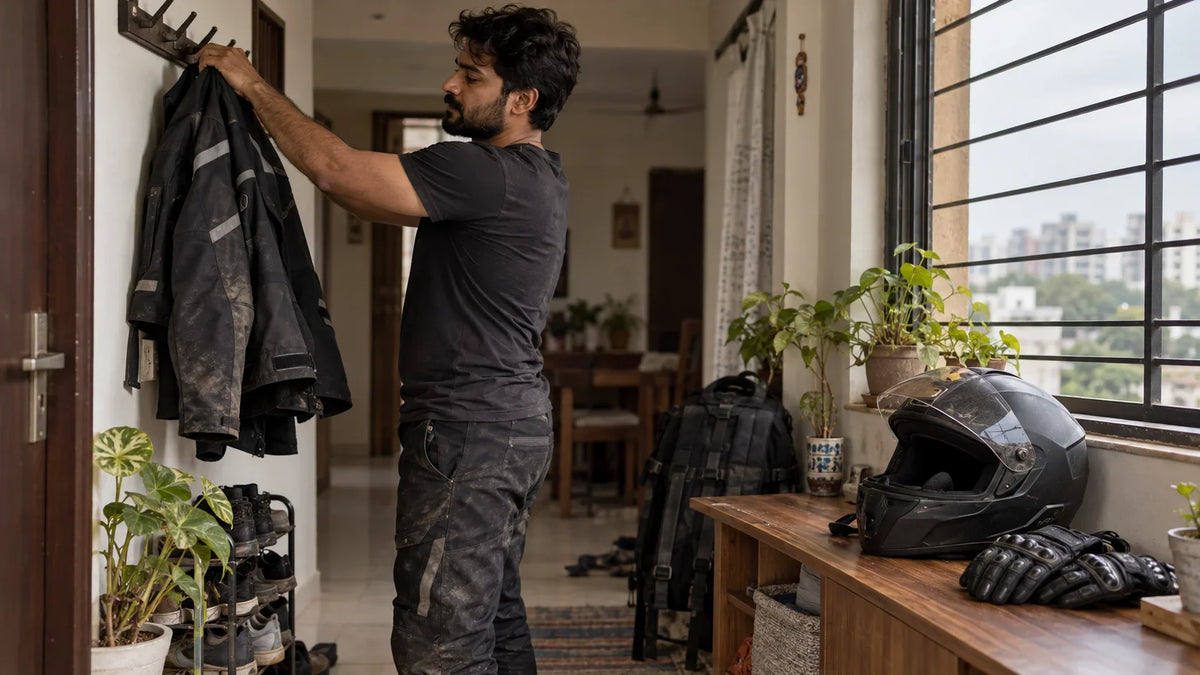
You reach home after a hot ride, drop your gloves on the seat, and leave your helmet in the cupboard. Tomorrow, you do it all again. That habit traps sweat and moisture in the gear you wear closest to your skin. Over time, your kit can start to smell stale, feel uncomfortable, and need more than a quick airing.
A practical riding gear hygiene routine doesn't need to take half an hour. The trick is to separate daily habits from deeper cleaning, then follow the care instructions for each item. Your helmet, gloves, jacket and boots don't all need the same treatment. Here's a routine you can repeat after a commute, weekend ride or long tour.
Rider Takeaways
- Air damp gear in a well-ventilated place before storing it.
- Follow each item's care label. Heat, solvents and unsuitable washing can damage materials or protective components.
- Clean helmet liners and high-contact gear regularly; don't rely on fragrance to solve an underlying hygiene issue.
- A 2020 study of 130 motorcycle helmets recovered multiple bacterial and fungal groups, supporting regular, suitable helmet hygiene. Source: Sapkota et al., 2020.
What should you do immediately after every ride?
Start by unpacking your gear instead of leaving it in a closed bag. Moisture from sweat or rain needs a chance to escape. Put your helmet, gloves and jacket somewhere dry and ventilated, away from direct heat. Open vents and removable liners where the manufacturer permits it.
Empty your jacket pockets and loosen straps, cuffs and closures so damp areas aren't folded against each other. If your gloves are wet, open the cuffs and let air reach the inside. Stand boots upright and loosen their closures. Remove insoles only if the boot maker allows it.
Don't put damp gear straight into a cupboard, top box or sealed bag. Don't place it beside a heater or use a hair dryer on high heat. Strong heat can affect some materials, adhesives and protective components. If you ride in the rain, let the gear dry fully before storing it.
A 2020 study examined 130 motorcycle helmets and recovered 392 bacterial isolates and 346 fungal isolates. Those are isolate counts from the study, not the number of contaminated helmets or a universal estimate for every rider. The practical takeaway is to maintain suitable helmet hygiene and follow the manufacturer's cleaning guidance.
Source: Sapkota et al., International Journal of Microbiology, 2020.
After every ride, unpack your motorcycle gear and let damp areas dry in a ventilated space. Open gloves, loosen jacket closures and allow air to reach helmet padding where the manufacturer's instructions permit it. Avoid direct heat and sealed storage. Drying is a useful daily habit, but it doesn't replace periodic cleaning.
Related reading: How to clean your motorcycle helmet liner
How should you care for your helmet interior?
Your helmet needs a routine of airing, inspection and periodic cleaning. After a ride, place it in a clean, dry, ventilated area. Keep the visor and vents in the position recommended by the helmet maker. Don't leave the helmet baking in direct sunlight or inside a hot vehicle.
Check the manual before removing padding. If the liner is removable, wash it only as directed. Use the recommended cleaner and water temperature, rinse as instructed, and let every part dry fully before reassembly. If the padding isn't removable, follow the maker's approved spot-cleaning method. Avoid soaking the helmet shell or using household chemicals unless the manufacturer explicitly permits them.
Airing helps moisture escape, but it doesn't remove all soil or resolve every source of odour. If your helmet smells stale despite drying, inspect the liner and chin strap. Build in regular interior care rather than waiting until the smell becomes obvious.
Our recommendation: Make helmet care a two-part habit: air it after every ride, then schedule deeper care based on the manual, riding frequency and visible condition. That keeps a quick daily action from being mistaken for a full cleaning routine.
For an odour-control step between deeper cleans, use only a product designed for helmet interiors and compatible with your helmet materials. Hygena is a rider-focused helmet deodorant intended to help control odour at its source. Follow the product label and your helmet manufacturer's instructions; don't treat a deodorant as a substitute for washing removable padding when washing is needed.
Make helmet hygiene part of your post-ride routine: explore Hygena's helmet deodorant.
A simple helmet-care timeline
Air the helmet and inspect its interior for dampness, residue or damage.
Clean the liner and other components using the approved method.
A motorcycle helmet's interior needs both everyday drying and periodic cleaning. A 2020 study by Sapkota and colleagues recovered bacterial and fungal isolates from sampled helmets, showing why hygiene shouldn't depend on smell alone. Follow your helmet manual when cleaning removable padding, straps and interior surfaces. Source: Sapkota et al., 2020.
Related reading: Why your motorcycle helmet smells
How do you keep jackets, gloves and boots fresh?
Treat each item according to its material and construction. Start with the care label, then remove armour or detachable liners only when the maker instructs you to do so. Never assume every textile jacket is machine-washable or that every glove can be soaked.
For a washable textile jacket, use the approved process and detergent. Close fasteners if instructed, remove protective inserts as directed, and dry the garment exactly as the manufacturer recommends. Leather usually needs a different approach. Use a suitable leather-care product and avoid soaking it or applying harsh household cleaners.

Gloves need extra care because they combine close skin contact with seams, liners and protective parts. Some manufacturers advise hand cleaning with a damp cloth and mild or specialist cleaner. Avoid solvents, fabric softeners and direct heat when the maker warns against them. Let the inside dry fully before your next ride.
Boots collect sweat and moisture around the footbed. Wipe the exterior with a suitable method, loosen the closures and air the inside. If removable insoles are approved, take them out to dry separately. Don't store boots while they're still damp.
REV'IT!'s official care guidance advises cleaning its gloves by hand with a damp cloth, avoiding hot water and solvents, and keeping them away from direct heat and sunlight. This is manufacturer-specific guidance, not a universal rule for every glove. Check the care instructions for your own gear before cleaning it.
Source: REV'IT! Wash & Care.
A practical weekly check can be simple: inspect high-sweat areas, look for lingering dampness, and note any persistent smell, residue or damage. Don't use a strong fragrance to cover a problem you haven't identified.
Motorcycle jackets, gloves and boots can use different materials and protective constructions, so one cleaning method won't suit every item. Follow the maker's label, remove armour only as directed, avoid prohibited solvents or heat, and dry gear completely before storage. Manufacturer-specific glove guidance from REV'IT! recommends hand cleaning and ventilated storage.
How often should you clean riding gear?
There isn't one evidence-backed interval that fits every rider and every piece of gear. A delivery rider working long shifts in summer will build up sweat differently from someone who rides on Sundays. Rain, dust, trip length, layering and the gear's materials all change the care needed.
Use three signals: the maker's schedule, the amount of use, and the condition of the item. Air gear after every ride. Inspect it regularly. Clean washable liners and garments according to their care labels, and sooner when they become visibly dirty or develop persistent odour. If the manufacturer gives a specific schedule, use that over a generic internet rule.

Don't wait for a smell before checking your gear. Look for damp padding, residue around contact points, dirt in glove liners and moisture inside boots. If you notice skin irritation that persists, stop using the item until you've checked its condition and consider advice from a healthcare professional.
If your gear is still damp when you next need it, your drying setup needs attention. If the odour returns quickly after cleaning, check whether the item needs a deeper, manufacturer-approved clean.
Choose your next care step
Identify the approved cleaning and drying method.
Account for sweat, rain, dust and time spent riding.
Air it, clean it as directed, or seek manufacturer guidance if you find persistent odour or damage.
What mistakes can damage your riding gear?
The biggest mistake is treating all gear like ordinary laundry. Protective garments may include membranes, coatings, leather, adhesives, impact protectors and specialised liners. A method that works on a cotton T-shirt may harm one of those components.
Avoid these shortcuts:
- Don't machine-wash an item unless its manufacturer permits it.
- Don't use bleach, solvents, petrol or household cleaners unless the care instructions explicitly approve them.
- Don't dry protective gear on a radiator or with high heat.
- Don't put wet gloves, boots or liners into sealed storage.
- Don't reassemble removable padding before it's completely dry.
- Don't assume fragrance means an item is clean.
If you can't find the care label or manual, look up the exact model on the manufacturer's official website. When in doubt, ask the manufacturer before using a chemical or washing method. Replacing damaged protective gear may cost more than taking a few minutes to check first.
Our finding: The best routine is the one that protects both hygiene and the gear's intended function. Drying, cleaning and deodorising are separate jobs. Choose the right one for the problem instead of reaching for the same spray or wash every time.
Related reading: Motorcycle gear odour removal
Frequently asked questions
Can I spray perfume inside my helmet?
Perfume may cover an odour without addressing the reason it developed. Don't spray perfume or household fragrance inside your helmet unless the helmet maker approves it. Use compatible products as directed, and clean removable padding according to the manual when it needs cleaning.
Is airing riding gear enough to keep it hygienic?
Airing helps moisture escape, but it isn't the same as cleaning. A 2020 study of 130 motorcycle helmets recovered bacterial and fungal isolates, supporting regular, suitable helmet care. Air gear after each ride, then clean it according to the manufacturer's instructions and the item's condition. Source: Sapkota et al., 2020.
Can I wash motorcycle gloves in a washing machine?
Don't assume you can. Gloves vary by material, construction and protective features. REV'IT!'s guidance, for example, advises against machine washing its gloves. Check the instructions for your exact pair before washing or soaking them. Source: REV'IT! Wash & Care.
How do I stop my riding gear smelling after a long tour?
Unpack everything as soon as you stop for the day. Air your helmet, open gloves, loosen jacket closures and dry boots in a ventilated place. Wash items only as directed by their manufacturers. For helmet odour between deeper cleans, consider a compatible helmet-specific hygiene product and follow its label.
Build a routine you'll actually follow
Your riding gear takes care of you on the road. Give it a little attention when the ride ends. Air damp items, inspect the high-contact areas, and clean each piece according to its own care instructions. That simple habit helps prevent stale storage and reduces the temptation to mask every smell with fragrance.
Start with your helmet because it sits against your head and face. Keep its interior dry, clean removable parts as directed, and use only compatible products. Hygena's helmet deodorant can fit into that between-cleaning routine when used according to its label.
Keep the routine realistic: unpack, air, inspect, and schedule cleaning. For more detail, read our guides to helmet liner hygiene and rider hygiene on long rides. Then make post-ride care as automatic as putting your bike away.
Sources
- Sapkota, S. et al. (2020). "Microbial Diversity and Antibiotic Susceptibility Pattern of Bacteria Associated with Motorcycle Helmets." International Journal of Microbiology. Read the study (accessed 18 October 2026).
- REV'IT! Sport International. "Wash & Care." Read the care guidance (accessed 18 October 2026).
- Triumph Motorcycles. "How to Clean Your Mesh Motorcycle Jacket." Read the article (accessed 18 October 2026).
- BMW Motorrad India. "Care instructions." Read the care instructions (accessed 18 October 2026).
Share:
Helmet Cleaner Spray: What Actually Works?
Helmet Cleaner Spray: What Actually Works?